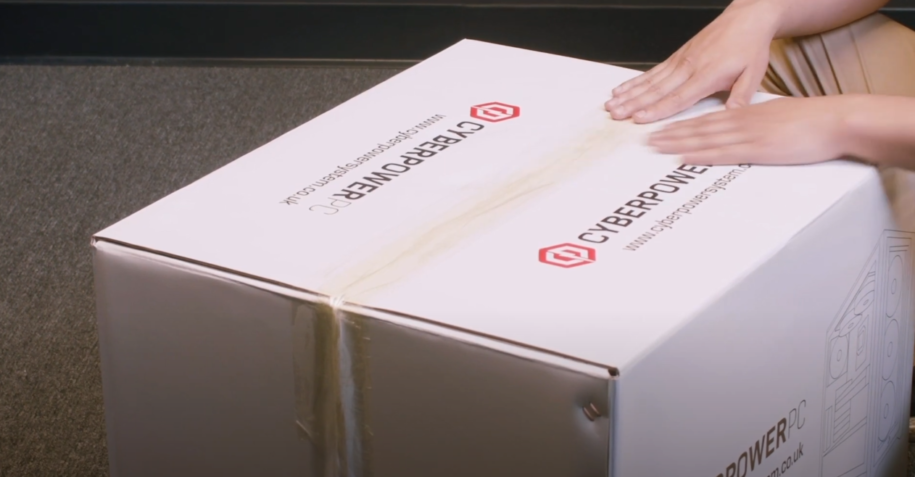
In the unlikely event that you need to send your gaming PC back to us for a repair or return, it is important to make sure your desktop has a safe journey home.
Let’s make sure your gaming pc arrives back to our facilities safe and sound. Whether you are returning a computer or sending it in for a repair or replacement this article details how to pack and send back your PC to us, using our convenient return kit packaging.
For a video version demonstrating these same instructions, click here.
Step 1. Ensure Your Have Necessary Items
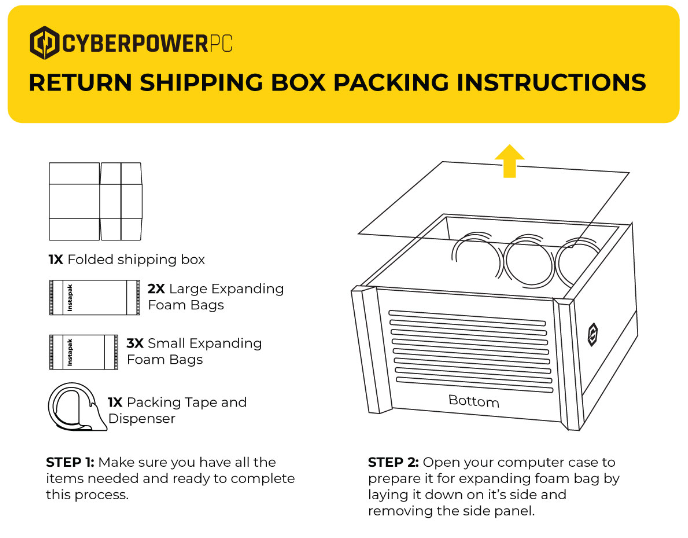
Take a look at the image above. Make sure you have all of the necessary packaging out and ready for this process.
Step 2. Open Your PC
First things first, let’s get your PC open. This is to prepare it for expanding foam. Lay it down on it’s side and remove the side panel.
IMPORTANT
Please read before you proceed. Steps 3-6 must all be completed within 20 second, so be well prepared with your materials and know what you need to do with each.
Step 3.
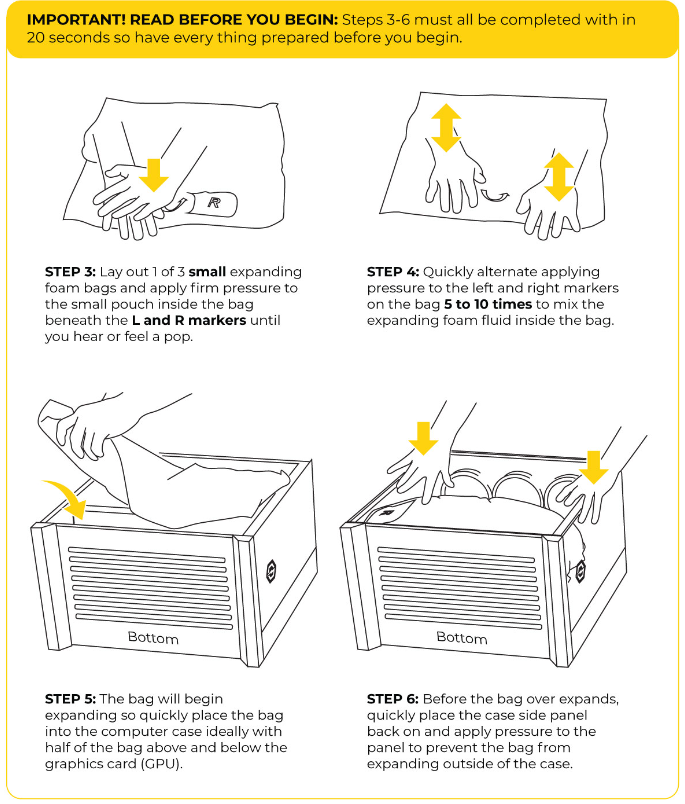
Lay out 1 of 3 small expanding foam bags and apply a nice firm pressure to the small pouch that you can feel inside of the bag, beneath the L and R markers. Press down until you hear or feel a pop.
Step 4.
Imagine you are a cat making biscuits. Quickly alternate applying pressure to the left and right markers on the bag 5 to 10 times to mix the expanding foam fluid inside the bag.
Step 5.
It’s time to act quick. The bag of foam will begin expanding, so quickly place the bag into your computer. Your goal here is to have half of the bag above and below the graphics card (GPU), cradling it softly.
Step 6.
Don’t slow down now. The bag of foam will continue to expand. Before it over expands, place the side panel back on your PC.Provide a gentle downward pressure on the glass to ensure that the bag continues to expand inside of the PC, without spilling out from any crevices.
Step 7.
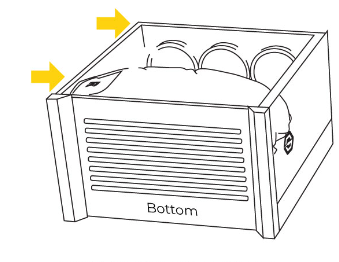
After around 15 seconds, the bag should finish it’s expansion. Whoow glad that’s over with. Secure your side panel with screws, or tape the panel shut if it is a hinged glass door. You can now set your computer to the side.
Step 8. Assembling The Box

Open up the folded box. Tape the bottom of the box. You can identify the bottom of the box based on the icons on the side of the box. Ensure that the arrows face down.
Step 9.

Flip the box over right side up. Look inside the box and you will see a flap at the bottom. Peel off the label over the double sided tape to leave the adhesive side exposed.
Step 10.

Place 1 of 2 large expanding bags into the box with the L and R marker side over the double sided tape to prevent the bag from shifting around when it expands.
IMPORTANT
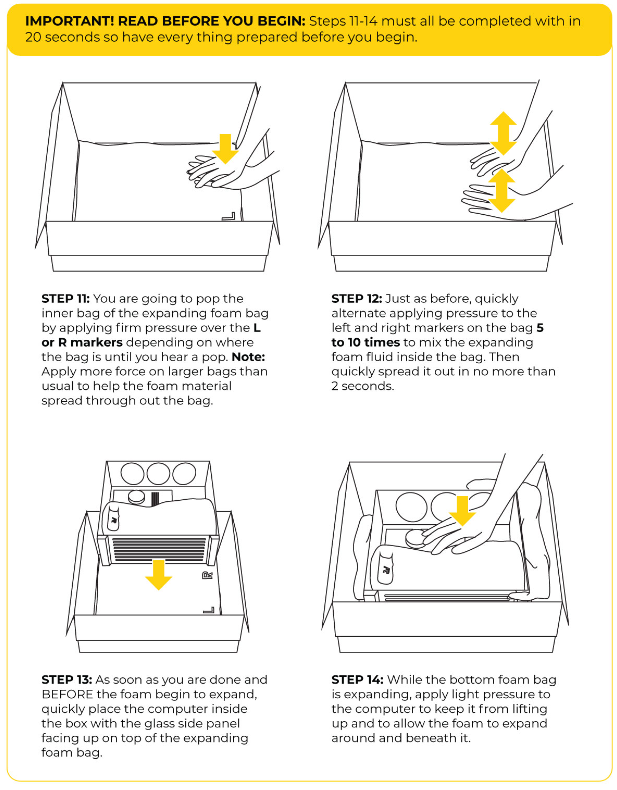
It’s expanding foam time again. Please read before you proceed. Steps 11-14 must all be completed within 20 second, so be well prepared with your materials and know what you need to do with each.
Step 11.
Pop the inner bag of the expanding foam bag by applying firm pressure over the L or R markers depdning on where the bag is until you hear and feel that familiar pop from before. Pro tip: apply more force on the large foam bags to help the foam spread throughout the bag.
Step 12.
Just like before, quickly alternate applying pressure to the left and right markers on the bag, around 5 to 10 times should do the trick. Then quickly spread it out in no more than 2 seconds.
Step 13.
As soon as you are done and before the foam begins to expand, grab your PC and place it inside the box with the glass side panel facing up on top of the expanding foam bag.
Step 14.
While the bottom foam bag is expanding, apply light pressure to the computer to keep it from lifting up and to allow the foam to expand around and beneath the PC.
IMPORTANT
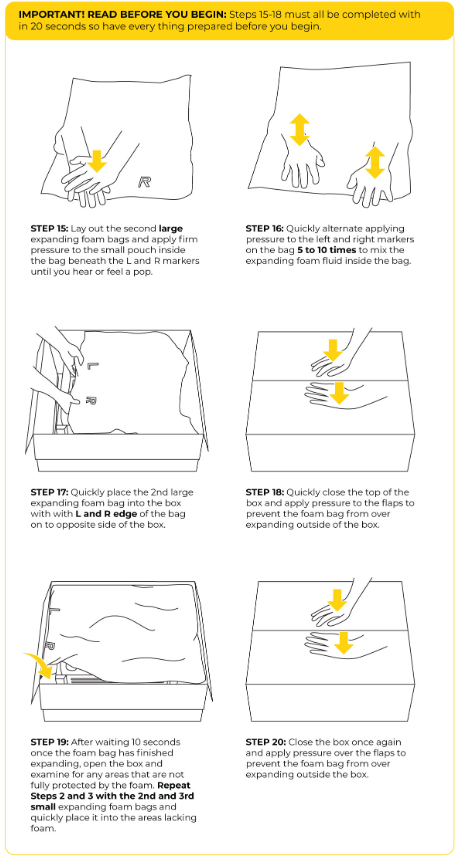
Please read before you proceed. Steps 15-18 must all be completed within 20 second, so be well prepared with your materials and know what you need to do with each.
Step 15.
Lay out the second large expanding foam bags and apply a firm pressure to the small pouch inside the bag, under the L and R markers. Do this until you feel or hear a pop.
Step 16.
Quickly alternate applying pressure to the left and right makers on the bag 5 to 10 times to mix the expanding foam fluid inside the bag.
Step 17.
Move quick! Place the second large expanding foam bag you just prepped in to the box with the L and R edge of the bag on to the opposite side of the box.
Step 18.
Quickly close the top of the box flaps. Apply a downwards pressure to the flaps to prevent the foam bag from over expanding outside of the box. Don’t let the foam escape.
Step 19.
After doing this for about 10 seconds the foam should be done expanding. Open the box and examine for any areas that are not fully protected by the foam. Repeat steps 2 and 3 with the 2nd and 3rd small expanding foam bags to fill in areas lack foam and protection. Fill those gaps!
Step 20.
Close the box again. Press down on the flaps to prevent the foam bags you used to fill the gaps from expanding outside of the box.
Step 21.
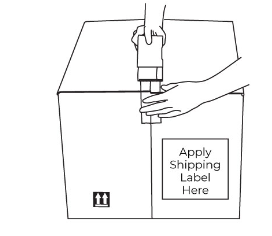
Great job! Your gaming PC is now ready for a safe journey back to our facilities.
Use the tape to close up the top of the box. Apply your shipping label to the side of the box and go ship your PC back to us!
We hope this helped you out. We wish all the PCs headed back to us safe travels out there!